環境:CentOS 8
install yasm
goto http://www.tortall.net/projects/yasm/releases/ and find the lastest version
1
2
3
4
5
6
7
|
wget http://www.tortall.net/projects/yasm/releases/yasm-1.3.0.tar.gz
tar -zxvf yasm-1.3.0.tar.gz
cd yasm-1.3.0/
./configure
yum -y install gcc automake autoconf libtool make
make
make install
|
goto https://github.com/qupai/ or google x264 to find it in github
1
2
3
4
5
|
git clone https://github.com/qupai/x264.git
cd x264/
./configure --enable-shared
make
make install
|
install ffmpeg
goto https://ffmpeg.org/download.html and find the lastest version
 1
 2
 3
 4
 5
 6
 7
 8
 9
10
11
12
13
14
15
16
17
18
|
wget https://ffmpeg.org/releases/ffmpeg-4.2.2.tar.bz2
tar -jxvf ffmpeg-4.2.2.tar.bz2
export PKG_CONFIG_PATH=/usr/local/lib/pkgconfig:$PKG_CONFIG_PATH  # 设置 PKG_CONFIG_PATH,通过pkg-config去指定路径自动寻找需要链接的依赖库
./configure --enable-shared --enable-libx264 --enable-gpl --prefix=/usr/local/ffmpeg
vi /etc/profile
## add two line:
# export FFMPEG_HOME=/usr/local/ffmpeg
# export PATH=$FFMPEG_HOME/bin:$PATH
##
# ./configure --enable-shared --prefix=/usr/local/ffmpeg
make
make install
vi /etc/ld.so.conf
## add two line:
# /usr/local/ffmpeg/lib
# /usr/local/lib
##
ldconfig
|
install dependencies: EPEL
1
2
3
|
yum -y groupinstall 'Development Tools'
yum -y install epel-release
yum install -y  wget git unzip perl perl-devel perl-ExtUtils-Embed libxslt libxslt-devel libxml2 libxml2-devel gd gd-devel pcre-devel GeoIP GeoIP-devel
|
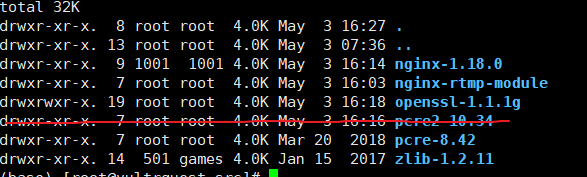
Enter directory.
Nginx: download the lastest source code arrording to news.
1
2
|
wget https://nginx.org/download/nginx-1.18.0.tar.gz
tar -xzvf nginx-1.18.0.tar.gz
|
pcre: if you download the lastest source code arrording to ftp, your will get make error like.
1
2
3
4
5
6
|
make[2]: Entering directory `/home/me/Desktop/pcre2-10.10'
make[2]: *** No rule to make target `libpcre.la'. Stop.
make[2]: Leaving directory `/home/me/Desktop/pcre2-10.10'
make[1]: *** [/home/me/Desktop/pcre2-10.10//.libs/libpcre.a] Error 2
make[1]: Leaving directory `/home/me/Desktop/nginx-1.8.0'
make: *** [build] Error 2
|
so, just install the old version.
1
2
|
wget https://ftp.pcre.org/pub/pcre/pcre-8.42.zip
unzip pcre-8.42.zip
|
zlib: here is the official web, the latest release is still 2017 during my writting.
1
2
|
wget https://www.zlib.net/zlib-1.2.11.tar.gz
tar -xzvf zlib-1.2.11.tar.gz
|
OpenSSL: download the lastest source code from official web.
1
2
|
wget https://www.openssl.org/source/openssl-1.1.1g.tar.gz
tar -xzvf openssl-1.1.1g.tar.gz
|
RMTP: clone the Nginx RTMP Module source code using git command.
1
2
|
git clone https://github.com/sergey-dryabzhinsky/nginx-rtmp-module.git
rm -f *.tar.gz *.zip  # remove all compressed tar.gz and .zip files.
|
check
config: configure according to What you have download.
 1
 2
 3
 4
 5
 6
 7
 8
 9
10
11
12
13
14
15
16
17
18
19
20
21
22
23
24
25
26
27
28
29
30
31
32
33
34
35
36
37
38
39
40
41
42
43
44
45
46
47
48
49
50
51
52
53
54
55
|
./configure --prefix=/etc/nginx \
            --sbin-path=/usr/sbin/nginx \
            --modules-path=/usr/lib64/nginx/modules \
            --conf-path=/etc/nginx/nginx.conf \
            --error-log-path=/var/log/nginx/error.log \
            --pid-path=/var/run/nginx.pid \
            --lock-path=/var/run/nginx.lock \
            --user=nginx \
            --group=nginx \
            --build=CentOS \
            --builddir=nginx-1.18.0 \
            --with-select_module \
            --with-poll_module \
            --with-threads \
            --with-file-aio \
            --with-http_ssl_module \
            --with-http_v2_module \
            --with-http_realip_module \
            --with-http_addition_module \
            --with-http_xslt_module=dynamic \
            --with-http_image_filter_module=dynamic \
            --with-http_geoip_module=dynamic \
            --with-http_sub_module \
            --with-http_dav_module \
            --with-http_flv_module \
            --with-http_mp4_module \
            --with-http_gunzip_module \
            --with-http_gzip_static_module \
            --with-http_auth_request_module \
            --with-http_random_index_module \
            --with-http_secure_link_module \
            --with-http_degradation_module \
            --with-http_slice_module \
            --with-http_stub_status_module \
            --http-log-path=/var/log/nginx/access.log \
            --http-client-body-temp-path=/var/cache/nginx/client_temp \
            --http-proxy-temp-path=/var/cache/nginx/proxy_temp \
            --http-fastcgi-temp-path=/var/cache/nginx/fastcgi_temp \
            --http-uwsgi-temp-path=/var/cache/nginx/uwsgi_temp \
            --http-scgi-temp-path=/var/cache/nginx/scgi_temp \
            --with-mail=dynamic \
            --with-mail_ssl_module \
            --with-stream=dynamic \
            --with-stream_ssl_module \
            --with-stream_realip_module \
            --with-stream_geoip_module=dynamic \
            --with-stream_ssl_preread_module \
            --with-compat \
            --with-pcre=../pcre-8.42 \
            --with-pcre-jit \
            --with-zlib=../zlib-1.2.11 \
            --with-openssl=../openssl-1.1.1g \
            --with-openssl-opt=no-nextprotoneg \
            --add-module=../nginx-rtmp-module \
            --with-debug
|
Compile and install Nginx with RTMP module by running following commands.
Create a new symlink module directory.
Create a new nginx user and group.
Create a new nginx cache directory.
1
2
3
4
|
ln -s /usr/lib64/nginx/modules /etc/nginx/modules
useradd -r -d /var/cache/nginx/ -s /sbin/nologin -U nginx
mkdir -p /var/cache/nginx/
chown -R nginx:nginx /var/cache/nginx/
|
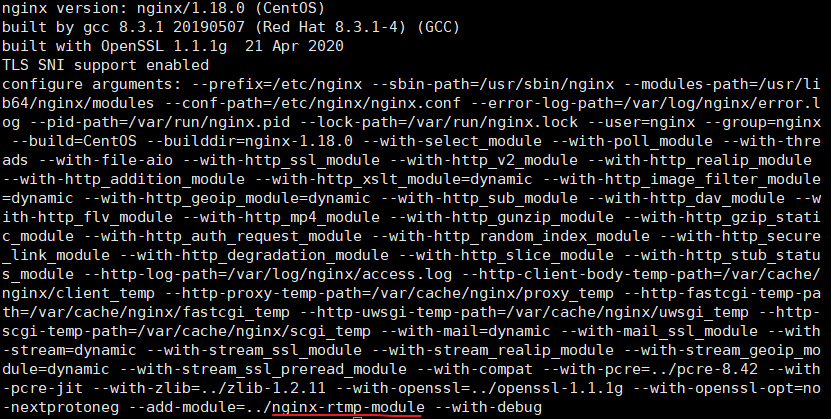
check
1
2
|
nginx -t # test nginx configuration
nginx -V # the installed nginx version
|
Nginx
Go to the ‘/lib/systemd/system’ directory and create a new ‘nginx.service’ file using vim.
1
2
|
cd /lib/systemd/system/
vim nginx.service
|
paste the configuration below.
1
2
3
4
5
6
7
8
9
10
11
12
13
14
15
16
|
[Unit]
Description=nginx - high performance web server
Documentation=https://nginx.org/en/docs/
After=network-online.target remote-fs.target nss-lookup.target
Wants=network-online.target
[Service]
Type=forking
PIDFile=/var/run/nginx.pid
ExecStartPre=/usr/sbin/nginx -t -c /etc/nginx/nginx.conf
ExecStart=/usr/sbin/nginx -c /etc/nginx/nginx.conf
ExecReload=/bin/kill -s HUP $MAINPID
ExecStop=/bin/kill -s TERM $MAINPID
[Install]
WantedBy=multi-user.target
|
Reload the systemd system, start the nginx service and enable it to launch everytime at system boot.
1
2
3
|
systemctl daemon-reload
systemctl start nginx
systemctl enable nginx
|
Nginx RTMP Module
Go to the ‘/etc/nginx’ configuration directory and backup the original ‘nginx.conf’ file.
1
2
|
cd /etc/nginx/
mv nginx.conf nginx.conf.asli
|
Create a custom configuration ‘nginx.conf’.
Paste Nginx RTMP configuration below.
 1
 2
 3
 4
 5
 6
 7
 8
 9
10
11
12
13
14
15
16
17
18
19
20
21
22
23
24
25
26
27
28
29
30
31
32
33
34
35
36
37
38
39
40
41
42
43
44
45
46
47
48
49
50
51
52
53
54
55
56
57
58
59
60
61
62
63
|
worker_processes auto;
events {
worker_connections 1024;
}
# RTMP configuration
rtmp {
server {
listen 1935; # Listen on standard RTMP port
chunk_size 4000;
# Define the Application
application show {
live on;
# Turn on HLS
hls on;
hls_path /mnt/hls/;
hls_fragment 3;
hls_playlist_length 60;
# disable consuming the stream from nginx as rtmp
deny play all;
}
}
}
http {
sendfile off;
tcp_nopush on;
aio on;
directio 512;
default_type application/octet-stream;
server {
listen 8080;
location / {
# Disable cache
add_header 'Cache-Control' 'no-cache';
# CORS setup
add_header 'Access-Control-Allow-Origin' '*' always;
add_header 'Access-Control-Expose-Headers' 'Content-Length';
# allow CORS preflight requests
if ($request_method = 'OPTIONS') {
add_header 'Access-Control-Allow-Origin' '*';
add_header 'Access-Control-Max-Age' 1728000;
add_header 'Content-Type' 'text/plain charset=UTF-8';
add_header 'Content-Length' 0;
return 204;
}
types {
application/dash+xml mpd;
application/vnd.apple.mpegurl m3u8;
video/mp2t ts;
}
root /mnt/;
}
}
}
|
Create a new directory for the HLS configuration and we’ve defined the web root directory is on the ‘/mnt’ directory.
Create the ‘hls’ directory under the ‘/mnt’ directory and change the owner of the directory to the nginx user and group.
1
2
|
mkdir -p /mnt/hls
chown -R nginx:nginx /mnt/hls
|
Test the configuration and restart the nginx service.
1
2
|
nginx -t
systemctl restart nginx
|
Setup First RTMP Live Stream
Go to the ‘/etc/nginx’ configuration directory and edit the ‘nginx.conf’ file.
1
2
|
cd /etc/nginx/
vim nginx.conf
|
Paste configurations below in to the ‘rtmp { … }’ bracket.
1
2
3
4
5
6
7
8
9
|
# RTMP video on demand for mp4 files
application vod {
play /mnt/mp4s;
}
# RTMP stream using OBS
application stream {
live on;
}
|
Create a new directory ‘mp4s’ for storing all vod videos, and change the owner to the nginx user group. Then, test nginx configuration and make sure there is no error, then restart the nginx service.
1
2
3
4
|
mkdir -p /mnt/mp4s
chown -R nginx:nginx /mnt/mp4s
nginx -t
systemctl restart nginx
|
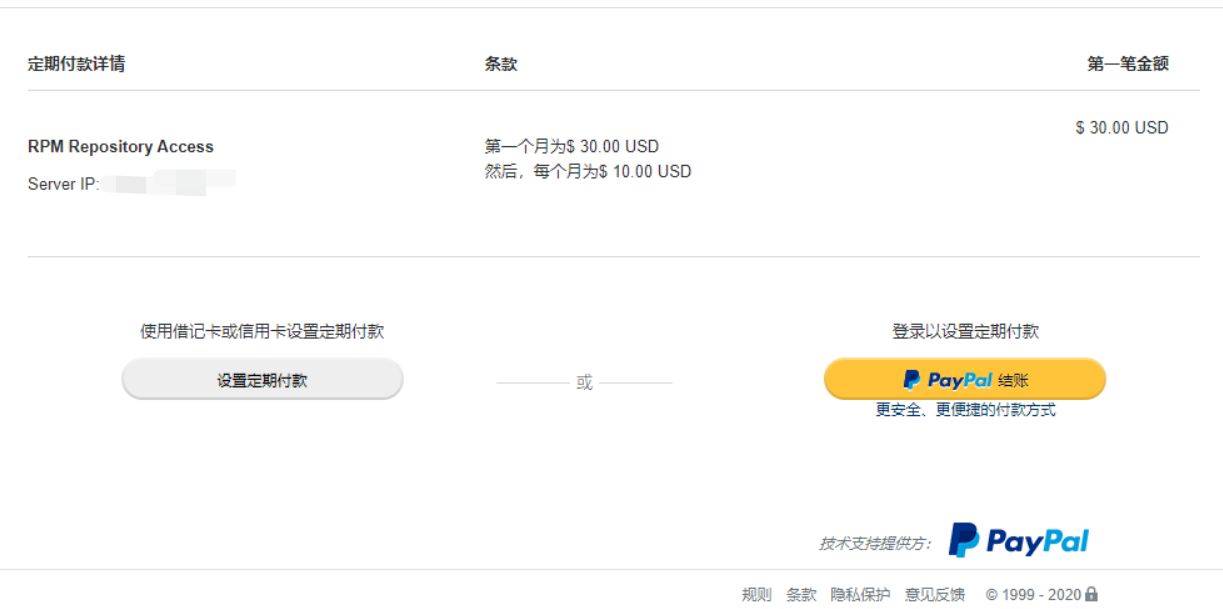
If you are rich
Install GetPageSpeed repository and install axel rpm package:
1
2
|
dnf install https://extras.getpagespeed.com/release-el8-latest.rpm
dnf install axel
|


Open firewall
1
2
3
4
|
firewall-cmd --permanent --add-service=http # permanently enable HTTP connections on port 80
firewall-cmd --zone=public --add-port=1935/tcp --permanent
firewall-cmd --list-ports    # check
firewall-cmd --reload
|
Run ffmpeg
常见错误
點播
Put videos in /mnt/mp4s
1
|
ffmpeg -re -i "/mnt/mp4s/your_video_name.mp4" -vcodec libx264 -vprofile baseline -acodec aac -ar 44100 -strict -2 -ac 1 -f flv -s 1280x720 -q 10 rtmp://{IP}:1935/stream/test1
|
type rtmp://149.248.57.125:1935/vod/your_video_name.mp4 in web as link and open the link in potplayer.
if you are brave
I am a coward
直播
因爲生活的壓力,目前沒時間做
大致命令
1
|
ffmpeg -re -i "/mnt/mp4s/ad286f25b01849e5b4832519b7d5ba76.mp4" -vcodec libx264 -vprofile baseline -acodec aac -ar 44100 -strict -2 -ac 1 -f flv -s 1280x720 -q 10 rtmp://149.248.57.125:1935/show/test2
|
需要配合攝像頭。有機會實現了以後再寫一篇教程,或者有人實現了給我推薦一篇教程。